
That feeling when you are creating something by yourself is amazing!
When I was a Kid I have loved to create things. Especially for Christmas, all kinds of paper decorations where my favorite. Today I can create many beautiful and interesting things.
When I first time made Trousers by myself it was such a cool feeling 😃 I was proud and super happy that I can wear what I have made! Or perhaps two meters long scarf that I have knitted myself.
Each project is a super adventure for me. Once you try, you will never stop.
Before I have create this Creative Bag, I have tried 4 different styles how to make Bees Wax Wraps. I was happy only with the last one, which you will find below.
Let’s learn how to make your own Bees Wax Wraps, which is very easy, it is super fun and your are doing something great for our Planet 🙌🏻 and for you!
Let’s begin🤓
What is in your Creative Bag:
- 6 pieces of rounded fabric (2 x 3 different sizes)
- 1x Bees Wax Flower
- 1x glass with lid
- 1x Brush
You will also need:
- Backing paper
- Iron
- Pan for a Water Bath
In tutorial will be used melting pan for visual purposes. 
First step is to set up pan with a water and glass with a Bees Wax Flower.
Make sure you put Glass to the water before you put it on Stove, to avoid thermal shock. Glass should be half immerse in a Water (it shouldn’t swim😄) see the phot below...
Remember: it is better to have less water (when it’s boiling it will be jumping all over the place and it might burn you).
Let it melt, it will take a bit of time until Water stars boiling and a Glass starts to heat.
Have ready backing paper with a textile next to Bees Wax Flowers “Water Bath”🛁.
Once Bees Wax Flowers is completely melted we can start.

Wax is cooling quit fast, that is why your backing paper with a textile should be close to Wax.
Reminder: be careful!

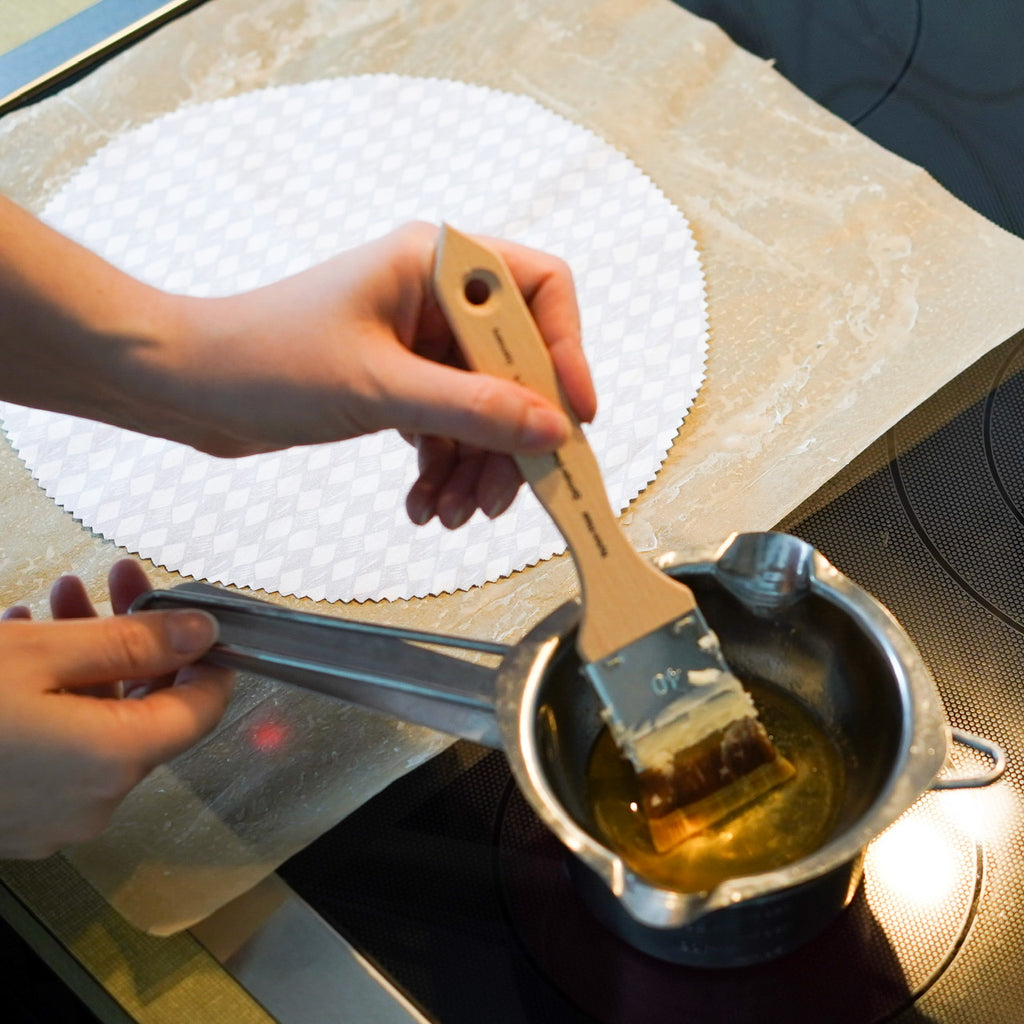
We have to work with a Brush quite fast, make couple of moves from the Center to the Edges.

We don’t need to cover the whole fabric since we will use Iron to melt it nicely into the whole textile area.

This is how it will look before we Iron it.
We need one backing paper as a base

And one backing paper on top.
Make sure you have correct size. You might use 2 more pieces belov to cover a bigger Area.
Start Ironing from the Center to Edges. Temperature on 2 dots or Cotton.
Wax will become liquid, be very careful, do not go too close to the paper edges.
You will see how Wax is melting 🤓
Remove Top paper while Wax is still liquid. Be careful it is hot and liquid 😃 don’t do any unnecessary moves with the paper, droplets of wax are very hard to get rid of from spaces 🙈
Carefully but fast.
Now we will pick up the fabric, REMEMBER it is hot. Same way as a we removed top backing paper, carefully and fast remove it from the base paper. 
Lightly blow while holding it with your fingers. In a few tens of second it will be cooled and ready to be used.

Tadaaa🥳 And now you will continue with the next 5 pieces 🙌🏻
Remember:
- You will have rests of cooled Wax on backing paper, that also one of the reasons why you don’t need to brush stroke way to many times.
- It is better to try first small sizes and see how it works.
- Be careful wax is really hot (I know what I am talking about😁)
- You will not use all of your Bees Wax Flower, let it cool and then close the lid. You can use it once you will want to refresh your Bees Wax Wraps
- Time to time you can also refresh them by Ironing wraps between 2 backing papers (same way as described in tutorial)
- Wash them with a little bit of detergent and slightly warm water then let it dry
Let’s meet in a creative dimension!
With Love
Gabriela- Ar design ATELIER