
When I was a kid we didn't have Advent Calendar, we didn’t even have Advent Wreath but we used to have Christmas Ikebana's that my Grandmother made for all of us and when I was old enough she only prepared a base and the rest was my job🤓
Since it’s almost middle of November, it is time to start preparing for Christmas and the Advent Calendar is a perfect project to begin with.
First I will ask you a question... Do you know when and where Advent Calendars tradition has began?
It was in the 19th century in Germany, it was called "Weihnachts Kalender". They used to count days till Christmas (as we do☺️ ), light the candles each day or hang pictures until the first carved wooden calendar was created. In 20th century calendars started to have mini doors where something mini could be added inside. Before the Wars, calendars where banned but in 1950 they appeared again in a form as we know it today😊
I wasn't really planning on having an Advent Calendar, but I have got an Idea and when that comes, there is no point in resisting😁 and because I have been collecting cartoon boxes and paper wrappings from all material orders, I have decided to use them wisely.
Let's begin.
Material:
- wrapping paper (strong wrapping paper from all deliveries you have got this year)
- star pattern + cookie cutter :)
- pencil
- white paper
- scissors
- sewing Maschine
- ribbon (24 pieces/ca. 50- 100 cm long)
- Paper punch
- Pen or stamps

There are many star patterns available on the Internet, but when you don't have a printer (and I don't), you can use cute cookie cutter, draw it’s shape on the paper and make couple of bigger lines around it, until you are supper happy with the size of a star😃 If you have a printer, just download it and print it out.
Let’s have some fun. 
I had a wrapping paper that is pre-cutted into small parts. I have tear them apart - 48 pieces and draw a star on every single piece.
Afterwards I was cutting 48 star pieces (took me about 2-3 hours to get it done). 
Drawing and cutting has to be precise, each piece has to fit on top of each other. 
We will sew 24 Star bags with a sewing Machine (but you can do it also by hand), using white thread (or whatever color you want to use, it is completely up to you). 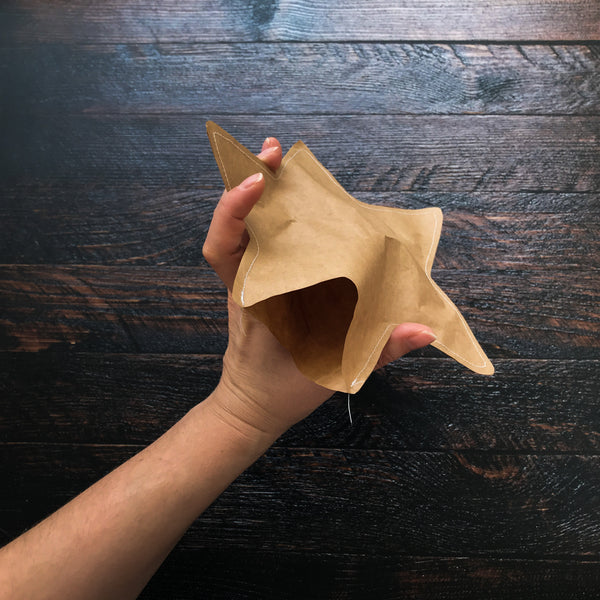
Sewing ca. 0.5cm from the edge, leaving one open V-end.
Sewing 24 pieces of a Star paper bags will take ca. 60-80 min. 
Take a paper cutter and on each Star paper bag cut a hole for a ribbon.

Star Bags can be used again and again for next couple of years until they fall apart 👍🏻 It is a cool way how to recycle a paper wrappings.
Each Star bag needs to have a number, so let's begin🤓 This is the part where even kids can help and get super creative. Then cut the ribbons (50-100 cm long pieces) and add them to each Star bag.

Done? Perfect!
All we need now are some cute mini things like sweets, mini cosmetics, lovely notes or ideas for activities as watching a movie, going for a walk or playing a table game.

Sharing is caring.
When you are finished with your project, take a picture and tag me in your Instagram stories @ar_design_atelier
📸 I will gladly share it in my stories too ❤️
Let’s meet in a creative dimension.
With Love
Gabriela- ar design ATELIER