It is very fascinating to see how many crafting techniques we try during childhood and how many comes back to life when we are older.
Usually we are trying to find a hobby alongside our busy and stressful jobs, or just to relax, find balance in every day life.
Macramé is a technique of knots, and trust me when I say it is absolutely amazing, it is super easy and anyone can learn it.
Let‘s begin :)

- 3 glass jars (sizes will always vary since they are recycled)
- 3 cord colors (each 15 m long)
- 3 tea candles (after they burn out, clean them from the rest of a wax and recycle them with metal waste)
- Scissors
- Measuring tape
- cup of tea or coffee or anything else you lIke
- time :)

Let‘s prepare cords for the small jar. We have to measure hight and circumference.
Jar is ca. 12cm high= we need 27 pieces of 50cm long cords.
For the circumference we need one long cord 100cm. 


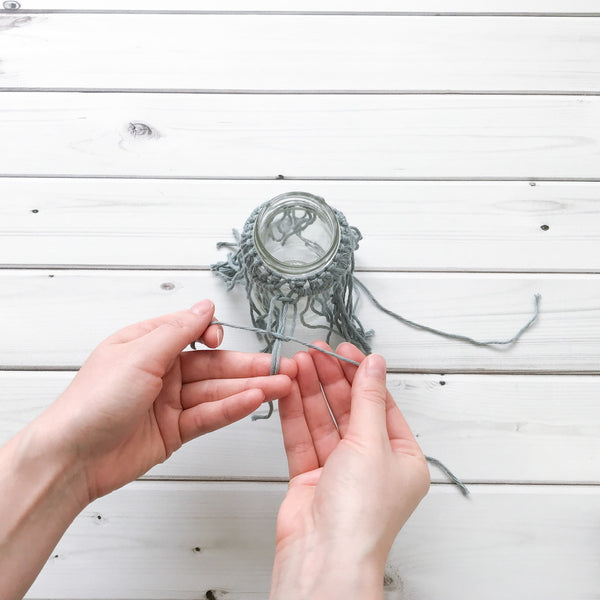
We will create a chain, same way as we did in a photo tutorial part one.
For chain is used Lark’s Head knot (short pieces tied up front to back) 5 pieces (the 28th piece is the knot which closes the chain).

For the main pattern we will use Diagonal Double Half Hitch. We will create 3 sections of 9's. We will make V-shape. 
Double Half Hitch is absolutely perfect knot for building a structure/ pattern. It depends on how much and how hight your are knotting. Each knot should have same strength and tightness.

From right to left and now we will go from left to right. In the centre we will make a knot. We will create three V's.
Once the V-shaped pattern is done, we will create mini "star" from Square Knot.

Now Square knot we have learnt in a first tutorial. We will use it here. Between each V-shape we will make 4 Square knots. 
Still working with group of two cords (which in the end are 4 cords since al cords are folded in a half). 
And one more.  It looks great isn't it :) let's make them between each V-shape.
After finishing Square Knot "stars" we will try reverse V's and create kind of an eye.
It's looking better and better :) Are you ready for the last knotting part? 
Our pattern is slowly coming to the end phase. Last knotting part is horizontal Double Half Hitch. Starting in the centre (is the main knot that closed our chain at the beginning) you can go to the right or to the left, it depends on how it feels best for you (I am left handed that is why I usually go from left to the right).

Start 0.5cm beloved's the V-shaped pattern and try to keep it in one line without additional waves. 
with scissors we will cut the rest of super long cords. Better cut smaller pieces at first. Afterwards we can use hair comb to carefully comb the cords (one hand covers the knots and the other one is using a hair comb :) ) and now use scissors again to make tassels perfectly straight and in one line :)
I hope you had as much fun as I did while working on these tutorials :)
Let's go to the third Macramé photo tutorial.
With love,
Gabriela- ar design atelier

